Traverse Standard v11.0
New Order
Use the New Order entry function to enter a new order for a customer.
To change the customer, enter or select a customer to view in the Customer ID field in the left navigation bar.
To enter a new order:
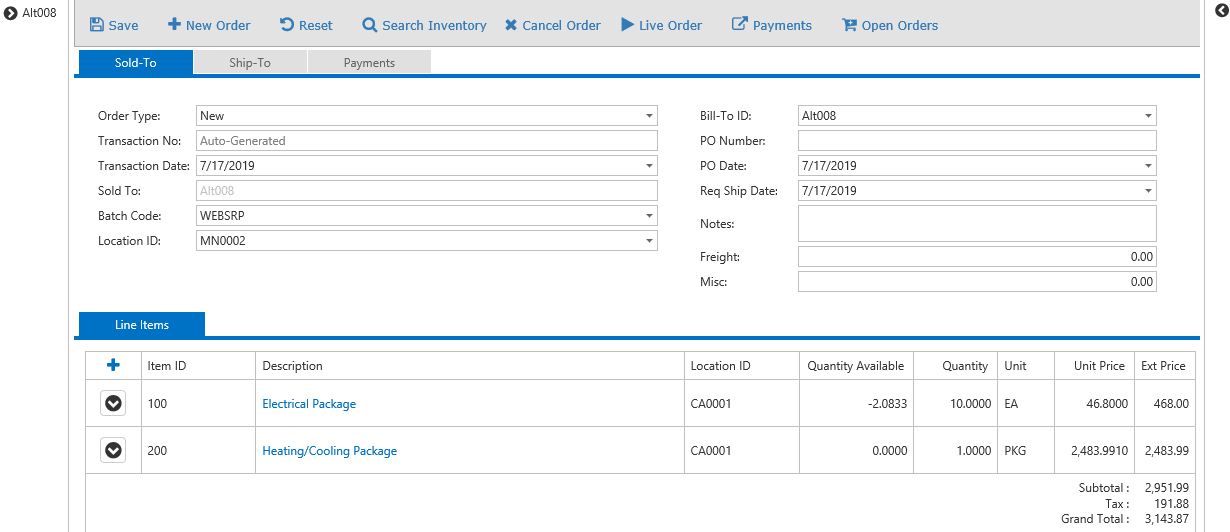
Use the New Order icon to initiate a new order. To view or edit open orders, use the Open Orders icon.
-
Depending on the option you selected for the Order Type business rule, the Order Type field may allow you to select the type of order to create ('New' or 'Price Quote') Note: If you create a new order type of 'Price Quote', the Payments tab will be disabled.
- Select a Bill-To ID.
- Change the Transaction Date, if necessary. By default, the transaction date is the current date.
- Enter the PO Number and the PO Date, as applicable. If the customer is set to require a PO number, this field is mandatory. You can set this option on the Customer Detail page.
- Select a Batch Code, if necessary.
- Enter a Requested Ship Date.
- Select a Location ID.
- Enter Notes for the order, as applicable.
- If there is a Freight or Misc charge, enter it into the appropriate field.
- Click the Save icon to save your changes, or the Cancel icon to discard your changes.
You can add line items to the order in a couple different ways:
- To search for a particular item, use the Search Inventory icon to open the Inventory Search page.
 Inventory Search Page
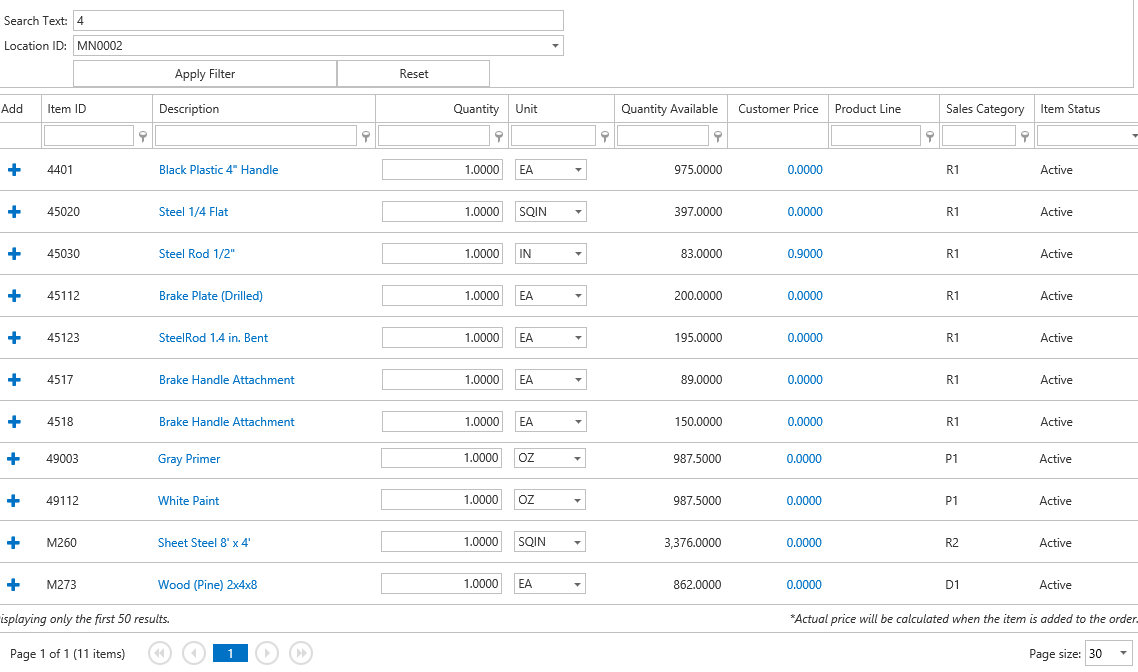
- Enter Search Text.
- Select a Location ID to search for the item.
- Click the Apply Filter button.
- Enter the Quantity for each item you want to add to the order. If there are quantity breaks available, click the blue Customer Price link to view the breaks.
- Accept or edit the selling Unit of measure.
- To add the item to the order, click the plus sign in the Add column. A small check mark will appear next to the plus sign once the item is added to the order.
When you are finished adding items to the order, click the View Order icon to return to the order page.
- If you know the item ID for the item you want to add to the order, enter it into the Line Items list
 Line Items manual entry
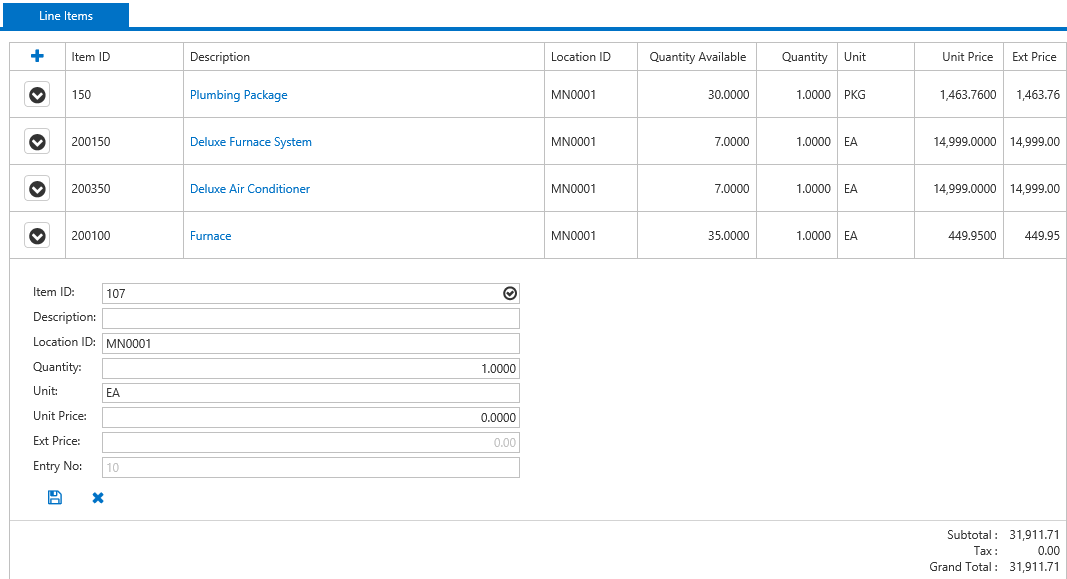
- Use the Add icon (
 ) to add a line item.
 - Enter the Item ID.
- To verify the item is a valid inventory item, click the Validate button (
 ) next to the Item ID field. If the item is a valid inventory item, the Description, Location ID, and Unit fields will populate. If the item is not a valid inventory item, a dialog box will appear notifying you the item is not in inventory.
 - Accept or select the Location ID for the item.
- Enter the Quantity of the item you want to order.
- Accept or select the Unit of measure you want to purchase. Note: The item Unit is the selling unit of measure.
- Accept or enter the Unit Price for the item.
- When you are finished entering item information, click the Update icon (
 ). To cancel adding the line item, click the Cancel icon (
 ).
).
- Use the Add icon (
- Use the icon (
 ) for a line item to choose these options:
 - Use the Edit Item icon (
 ) to make any changes to the line item.
 - Use the Delete icon (
 ) to remove the line item from the order.
 - If you want to add notes or attach an external document to the order, use the Attachment icon (
 ) on the right side of the screen.
 Attachment
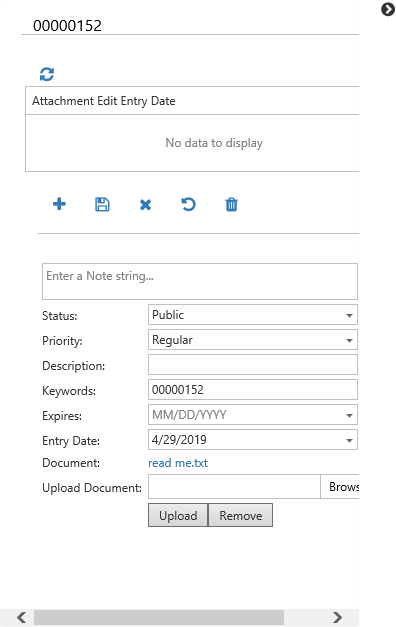
- Use the Add icon (
 ) to open the edit entry section of the attachment panel.
 - To add a note to the order, enter the note in the Enter a Note string... field.
- In the Status field, select Public to allow all users to see the note, or Private to restrict the note availability to the user who created it.
- Select the note Priority: Regular, High, or Low.
- Enter a Description of the attachment, as needed.
- Enter Keywords to use for searching or filtering notes.
- If the note is time-sensitive, select an expiration date in the Expires field.
- The Entry Date is read-only.
- To attach a document or image to the order, click in the Upload Document field to open a browse window, or click on the Browse... button. Select a document and click Open to add the path to the Upload Document field. Click on the Upload button to upload the file.
- A link to open the file will appear. To remove the file from the order, click the Remove button.
- When you are finished entering item information, click the Update icon (
 ). To cancel adding the attachment, click the Cancel icon (
 ). Use the Reset icon (
 ) to reset the attachment fields to their initial values.
 - Use the Delete icon (
 ) to remove the attachment.
- Use the Add icon (
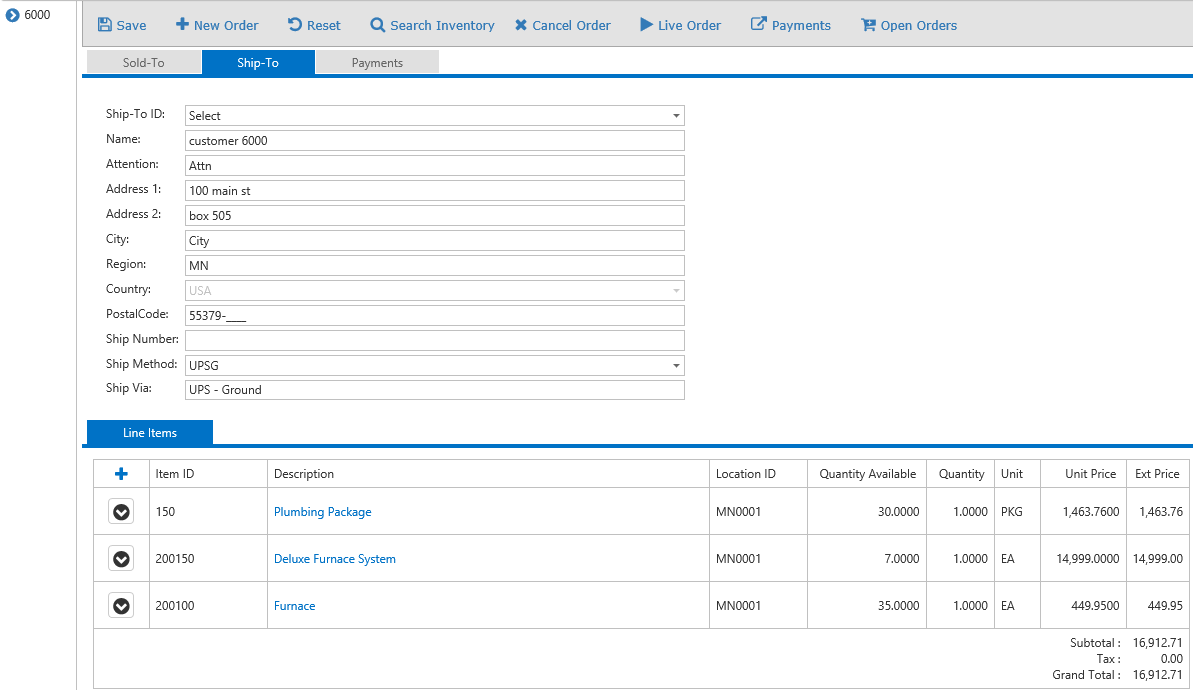
- Select a Ship-To ID, if applicable.
- Select a Ship Method. The description of the ship method appears in the Ship Via field.
- Make any changes as necessary to the customer's shipping information. Any changes you make on this page apply to the current order only.
- Enter the tracking number for the shipment, if available, in the Ship Number field.
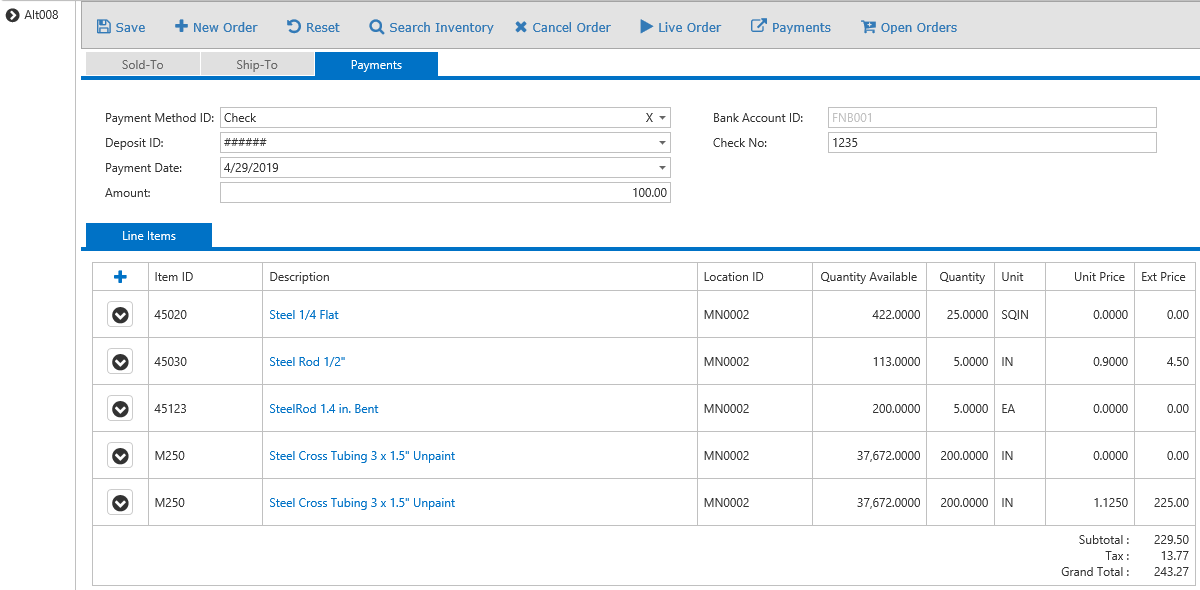
If the customer is prepaying any amount against the order, use the Payments tab.
- Select a Payment Method ID.
- Additional fields will appear depending on the payment method you choose. Fill in the additional fields as required.
- Select a Deposit ID.
- Enter a Payment Date. The default date is the current date.
- Enter the Amount of the payment.
Use the Payments icon to add an external payment to the order. Once you select the Payments icon, the Process Payments page will open.

- Accept or edit the Amount of the payment.
- Select a payment Service.
- If there are credit cards on record for the selected service, select one of the listed cards by marking the Action radio button for that card. To use a new card, mark the Use New Card check box.
- Once you have selected a card, use the Submit icon to submit payment.
- If you marked the Use New Card check box, a credit card information page for the selected payment service will open. Fill in the information as required, and click the Process Transaction button to continue. If you left the Use New Card check box blank, and selected a card from the list, the Open Order page will display.
Click the Save icon to submit the order. A confirmation dialog box will appear. Click OK to continue.
The order will be validated before submission. If there are any errors, the details will appear in red below the toolbar.

Once the order is validated, the Open Orders page will appear for that order.
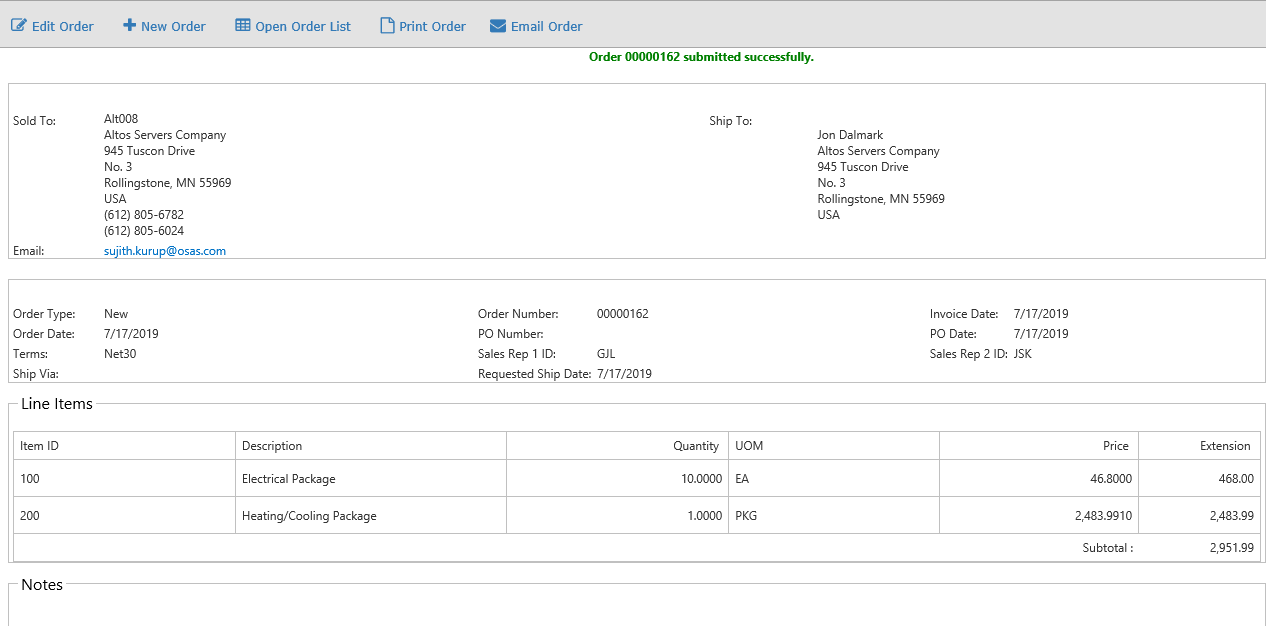
Use the icons on the toolbar to edit the order, create a new order, return to the open order list, print the current order, or send the current order via email.