Traverse Standard v11.0
Record Labor Time
Use the Record Labor Time function as an additional method for recording activity. This function is optional since you could use the Record Production Activity function to do the same function. Both functions access and write to the same data table. The difference between the two is the ease of use depending on how you record time ticket information. The Record Labor Time function is designed to be quicker and more efficient when the information you record is in employee ID sequence.
Recording Labor Time
- Click the New button, on the toolbar, to open a blank labor time record.
- Select an employee for whom you want to record labor from the Employee ID field. If interfaced with Payroll, the list of employee IDs will show payroll employees, otherwise it will show system manager employees.
- Select the associate order number from the Order Number field.
- Select the associated release number of the selected order number from the Release Number field.
- Enter the associated requirements ID in the Req ID field. The operations associated with the selected order number and release number will be available in the list.
- Enter either the start and end time in the Start Time and Finish Time fields OR enter the number of hours and minutes in the Hours and Mins fields.
- Edit, if necessary, the date that appears in the Date field.
- Enter the quantity produce in the Qty Produced field.
- Select, if applicable, a variance code to indicate a specific code describing a problem or not from the Variance Code field.
Note: This code is recorded in history, which enables you to select production history data based on this code. - Enter the quantity, if applicable, scrapped in the Qty Scrapped field.
- Select the Setup check box if the labor time you are entering is labor setup time.
- Select the Dup Machine check box if the order you are entering uses the same number of machine hours as labor hours. This saves you entry time, since rather than having to enter the labor hours here and the machine hours on the Record Production Activity screen, you can simply select this check box and the system assumes that the machine time was the same as the labor time.
- Enter any applicable notes or comments in the Notes field.
- Click the Save button, on the toolbar, to save the recorded labor time.
Reverse
Once labor activity is posted, you cannot edit it. If you need to make corrections on activity that has been posted, you reverse the original activity record, and then you can edit the labor activity. The edited activity will be posted in the current period. Use the Reverse button to reinstate the original activity and reverse the previous activity into the selected fiscal period/year.
NOTES:
- You cannot create a reversing entry in a closed fiscal period.
- You cannot change the fiscal period/year of an existing entry. If you need to change the fiscal period/year, you must either delete/re-enter the activity, or post/reverse the activity.
To reverse production activity:
- Select the posted labor activity entry you want to reverse.
- Click Reverse to open the Reverse Process window.
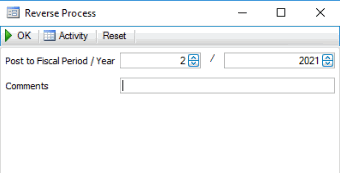
- Accept or enter the fiscal period/year to which the system will post the reversing entry in the Post to Fiscal Period/Year fields. Note the reversing entry uses the fiscal period from these fields and not the fiscal period of the original entry.
- Enter any Comments.
- Use the command buttons
Click To OK Run the reversal process. Activity Display the Activity Log to view posting activity. Reset Set all fields to their default values. - A notification will appear when the reversal process is complete.
- Once the reversal process is complete, you can edit the entry and proceed as usual.
The MP activity reversal will appear in the system audit activity log.
Editing Labor Time
- Select an employee for which you want to edit labor time from the Employee ID field.
- Edit the fields as necessary.
- Click the Save button, on the toolbar, to save the recorded labor time.
Deleting Labor Time
- Select an employee for which you want to delete labor time from the Employee ID field.
- Select the order for which you want to delete labor time from the Order Number field.
- Click the Delete button, on the toolbar, to delete the selected labor time.
- Click Yes at the "Are you sure you want to delete selected record(s)?" prompt.